Isaac.Truett.info
How to Create a Website on GitHub Pages
- simple
- quick
- free
This guide will explain how to set up a simple website hosted by GitHub Pages. The guide assumes that you have a GitHub account and that you have Git and a bash shell installed.
Open all sections
1. Create a project on GitHub
-
How
First, go to github.com and click the big "Start a project" button:

Next, give it a name. I used the domain name I was planning to use for my site, isaac.truett.info.
Finally, click the "Create repository" button at the bottom of the form:
Why
- Why are we creating a project on GitHub?
-
Two main reasons:
- You can have one GitHub Pages website for each account, organization, or project. I wanted to host my website on a custom domain, so it made more sense to me to use a project site named after the domain I was going to use.
- It gives us a place to store the source code for our website. I could store the source somewhere else and only push the finished HTML into GitHub, but that is more work. Keeping it all on GitHub is quick and simple and free.
- Why did I choose GitHub?
-
I have experience with GitHub, and I wanted to try out GitHub Pages, which I had never used before. Also, it's free as long as the repository is public. Since I'm building a public website with no server-side processing, I didn't see much point in trying to keep the source code private.
2. Initialize the new repository with a README.md file
-
How
Launch git-bash or a similar terminal and execute the following commands, substituting your GitHub username and site information.
$ cd /c/dev/git
$ mkdir isaac.truett.info
$ cd isaac.truett.info/
$ git init
$ echo "# isaac.truett.info" >> README.md
$ git add README.md
$ git commit -m "Hello, world."
$ git remote add origin git@github.com:itruett/isaac.truett.info.git
$ git push origin master
So what does all this do?
cd /c/dev/git- This command changes to the C:\dev\git directory, where I keep my local Git repositories.
mkdir isaac.truett.info- Make a new directory to craft my website in. I named it after my domain.
cd isaac.truett.info/- Change into the new directory.
git init- Creates .git directory where information about my new repository will be kept.
echo "# isaac.truett.info" >> README.md- echo prints back the text that follows it, and '>>' redirects that output into a file, README.md.
git add README.md- This tells git that I want to add README.md to the repository.
git commit -m "Hello, world."- This commits all of my changes (in this case, just the README.md file) to the repository.
git remote add origin ...- This tells git the location of my GitHub repository. You can work with multiple remote repositories, pushing and pull changes to them as you choose. I called my GitHub repo "origin" because that's the conventional name for the remote repo where your code officially "lives."
git push origin master- This push command sends the commit I just made to the "master" branch the remote repository called "origin."
Why
I chose to use the command line to initialize my repository because that is how I typically interact with a Git repository. You could use an IDE, or just check the "Initialize this repository with a README" option on the repository creation page.
For a more detailed look at the Git commands here, and many more, check out my Guide to Using Git.
3. Enable GitHub Pages
-
How
Go to your GitHub project's settings page (e.g., this one).
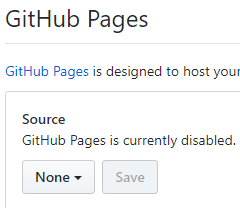
Select "master branch" as the source of your pages, and click Save.
Why
I chose to serve my pages out of the master branch directly because this repository's sole purpose is the website. If I were making an Open Source library or utility and building a website for that, then using a /docs folder would make sense.
Optional steps for buying and using a custom domain
4. Buy a domain
-
How
- Go to Google Domains and search for the domain name that you want.
- Add the domain to your cart
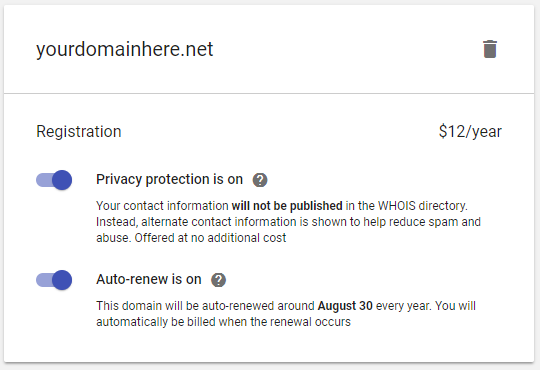
- Checkout, filling in your contact and payment information.
- It's a good idea to turn on privacy protection for a personal domain, to avoid having your name and home address published in searchable databases.
Why
There are many domain registrars you can choose to buy from. I chose Google Domains because I consider them to be trustworthy in this area, it was easy, and they supported a convenient payment method.
5. Set up DNS
-
How
From your list of shiny new domains, click the DNS icon:

Scroll down to "Custom resource records" and add two:
- An "A" record named "@" listing the GitHub Pages IP Addresses
- A CNAME record with a subdomain to use for your website pointing to you.github.io where "you" is your GitHub account name.
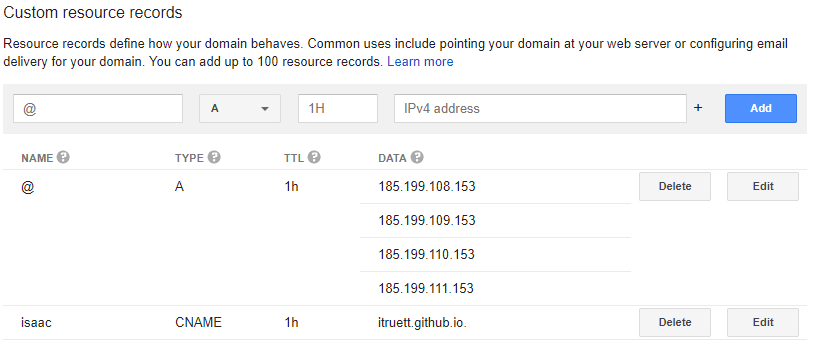
Why
The A record points your domain to the IP addresses of webservers owned by GitHub that serve Pages. Multiple IP addresses provides redundancy.
The CNAME record is like an alias for another name, in this case the name of your GitHub Pages account subdomain.
6. Add CNAME to file to repository
-
How
Create a CNAME file in the root of your project. The file contains the domain you set up for your website.
$ echo "isaac.truett.info" >> CNAME
$ git add CNAME
$ git commit -m "Added CNAME file."
$ git push origin master
Why
You can actually do this from the GitHub settings page by putting your domain name into the custom domain field. I was fiddling with that and found that every change I made was committing a change to my repository. I don't like to have a series of commits that just tweak one little setting around, so I made the version I wanted locally and did a force push to overwrite the changes made from the website. Don't do this at home, kids. Overwriting history is the dark side of the force.
At this point you should be able to add HTML pages to your repository and they will show up as pages on your site. You can also add CSS, JS, images, and other files. When you're ready to take the next step, you can explore layouts and includes to reduce duplication.